Friday, May 28, 2010

Round Three....FIGHT!

We had our third battle Thursday, 2010/05/27.  Because it was a weekday, Mike has night classes three times a week, and I've got a three year old and a four month old, we set a hard limit of 2230 being the cutoff time.  We started pretty close to 2030 and were making decent time until aforementioned infant spewed about four ounces of formula all over my wife.  So the game ended at about 2215 right in the middle of my shooting phase at the bottom of turn 5, with no clear victor apparent.  I don't know how in the hell the rulebook can be so blasé about 1000 point games taking "about an hour."

We rolled for Seize Ground and Pitched Battle, but went with Annihilation for simplicity since time was a factor.  Mike won the who's-on-first roll, and made me deploy first.  I had every intention of seizing the initiative but forgot to.

Deployment and infiltration complete.  Mike's scouts in the crater there did not take a scout move.

End of turn 1.  Mike took out my Broadside's gun drone, caused a wound on the Broadside, and pinned it.  He did pass his leadership test to not break, though.  I did a shitty job deploying my Hammerhead behind cover and the Predator zapped it for a Crew - Shaken result.  I moved my Kroot around to start moseying in the direction of the Captain; I keep forgetting that they have rapid fire weapons (I only think of them as melee and bubble wrap) so they didn't shoot at him.  It's hard to tell, but my Stealthsuit team and 2 HQ Crisis suits pulled of a kill or two against the scouts.

Another view of the end of turn 1.

I think this was the end of Mike's player turn 2.  ASMs are in melee with my Broadside and will remain there into turn 5.  The captain assaulted the Kroot and started whittling them down.  The Predator got another Crew - Shaken hit against my Hammerhead.  The Dreadnought splattered a Stealthsuit with a multimelta shot, but the other 2 passed their leadership test and held.

End of my player turn 2.  I finished off the Scouts with my Stealthsuit and HW teams and retreated them away from the Dread.  The XV88 stood back up and continued whaling away on the ASMs, with everybody passing their armor saves (get used to reading that).  The Koot and the Captain traded blows, with the Captain knocking off a few more Kroot but failing to break their spirits.  I think they put a single wound on him here.  I managed to destroy the storm bolter on the Rhino.

End of Mike's turn 3.  The Pred fried a Stealthsuit here with a lascannon shot.  I think.  It might have been an HQ drone.  Either way we did the Instant Death rule incorrectly; whoever the target was should've gotten a save, which I didn't take.  Just helps to make up for the fact that I was reading the Broadside Shas'vre statblock for several turns instead of the Shas'ui statblock because they're not one after the other on the Tau summary page.  WTF?  All it did was bump his leadership by 1, and I don't think he passed any tests by that slim a margin anyhow. The Dread blasted some shots at my Stealthsuit team (I think?) but failed to kill anyone.

End of my turn 3.  Dread is dead, due to some sharp shooting from my HQ Crisis suits.  The Broadside/ASM scuffle is still stalemated.  My Devilfish with embarked Fire Warriors arrived from reserve and my Hammerhead finally got to come out and play and managed to pop the Rhino but caused no casualties among the 10-man TSM squad (one of whom is wielding a lascannon).  I did a horrible job moving both of my skimmers, though, and they were not positioned well at all.  Mike definitely zapped a drone by now, and one of the HQ suits has a wound or 2 on it.  At this point most of my infantry units have NO CLUE what they should be doing, because you can't shoot into melee and that fucking Broadside would not die.  Kroot take a few casualties, hold, and maybe give the Captain his 2nd wound.

End of Mike's turn 4.  Kroot are all dead (Captain is cowering behind the yellow building there), the wounded HQ XV8 is dead (lascannon shot, took a save and failed), and the Hammerhead's Ion Cannon got blasted off.  ASMs suck miserably and can't kill my Broadside, god damn it all.

End of my turn 4.  My surviving Shas'el showed both his personal superiority and the manifest superiority of the Greater Good by rolling a 6 for penetration vs. the Pred's side-armor and then a 6 for damage-result, taking it down with a missile pod shot through an engine hatch or something.  My Stealthsuits start to move toward the TSM squad, as does the Shas'el with his assault move.  The Devilfish *pew*pew*s with it's burst cannon and drones, but doesn't do much; ditto the Hammerhead's Smart Missile System.

Mike's turn 5 finally saw the death of my XV88, and his lascannon took off the Hammerhead's SMS.  I was barely finishing my moves (Hammerhead decided not to tank shock, Devilfish was moving up to disembark for rapid-fire vs. the SM squad, Shas'el and Stealthsuits were going to pour it on vs. the ASMs) when my youngest puked up most of a bottle.  We tried to work in some shooting while I was helping my wife deal with that, but quickly decided to just call the game as it was almost exactly 2230 anyhow.

Hopefully we're going to play again on Monday, and I want to use the same lists as I've got ideas on how to work my tactics somewhat differently to force a different type of game.

Monday, May 24, 2010

Hatchet's Nid vs SM All Around Defenese

Nids(me) vs SM
1540 pts

My Army
HQ
Swarmlord
2x Tyrant Guard(lashwhips)
Elite
2x Hive Guard
Venomthrope
Troops
4x Tyranid Warriors (boneswords, scything talons)
5x Tyranid Warriors (4x deathspitters, venomcannom, scything talons)
9X Genestealers (toxin sacs, Broodlord)
20x Hormagaunts (toxin sacs)
Fast Attack
10x Gargoyles (toxin sacs)
Heavy
Trygon Prime

SM Army
HQ
Lysander w/ Command Squad
Force Commander
Elite
5x Terminators (power fists, stormbolters, power sword)
Dreadnought (assault cannon, close combat weapon)
Troops
10x Scouts w/Telion (6x Snipers, heavy bolter, bolt guns)
2x Tac Squad (Missile Launcher, flamer)
Heavy
1x Devastator Squad (2x Heavy Bolter, Plasma Cannon, Lascannon)

We decided to use the battle missions book for our game we ended up with the Space Marine special mission All Around Defense. This special mission has one objective point in the middle of the table and who ever controls it at the end of them game wins. We set the terrain up with four building in the center and some others scattered around the outside. The special rules for deployment was to take turns placing a unit, Space Marines could only deploy up to 12 inches away from the center marker and I had to deploy at least 18 inches away from the center marker. Since I was the attacker I also had place my HQ and Heavy in reserves at the start. After deployment it was a roll off to see who went first. The way everything was set up it looked like whoever went first was going to win. Luck was on my side and I got first turn.

Turn 1(me)
I had to keep my Swarmlord w/ guard and Trygon in reserve which worked out pretty good. I also kept my Genestealers in reserve.


I moved everything to be in position to assault. My shooting was lack luster. I killed 3 scouts with my warriors and just stunned the dreadnought with my hive guard. I ran my hormagaunts in a position so I can get his devastators and the tac squad in combat so I wouldn't have to worry about getting shot up from them.


I assaulted and was hoping for some amazing results since I have 60 attacks going towards the marines. I kill five marines and he kills 11 homagaunts after No Retreat! wounds. The gargoyles assaulted the other tac squad and didn't fair to well either, with 7 gargoyles down to his 3 marines. But considering the point cost comparison the gargolyes did great.


Turn 1(sm)
With all his units but Lysander w/ command squad, force commander and snipers in assault and the dreadnought being stunned he didn't have much to do. His snipers were out of coherency and had to move them, so lucky me didn't have to take any shots from them. He moved Lysander and company toward the hormagaunt assault and dropped an orbital bombardment on my warriors. I lucked out and he only hit one killing it out right.
The assault was a massacre he killed the rest of my hormagaunts and only lost one marine from his command squad due to having to take a dangerous terrain test thanks to my venomthrope.


My three gargolyes were amazing! ok well not really 2 of them died leaving me to have to take 2 No Retreat! wounds needing 2 6+ to save HE LIVED! One lone gargoyle holds off 7 Space Marines.

Turn 2(me)
I rolled for reserves and brought in my Swarmlord and Genestealers.
Again my shooting was lack luster with the only thing that happened was stunning the dreadnought. My bonesword warriors made their way to the tac squad that was still tied up the the gargoyle and assaulted. They destroyed the squad leaving a lonely Sargent but I did lose my gargoyle.


On the other side of the table my gun warriors and venomthrope attacked the command squad and tac squad. Things did not go so well for me with me losing everything and him taking no wounds.


Turn 2(sm)
Well now I'm in a bad spot and all his gun are bearing down on me.
His shooting commences and leaves me with a genestealer and a broodlord. He assaults and my genestealers and broodlord roll ok killing 2 of his command squad but he kills them in turn. His tac squad assaults my Swarmlord and guard. They kill all but Marine leaving me stuck in melee which sucks.


Turn 3(me)
My Trygon prime comes in right next to the scouts. Takes his 12, strength 5 shots and kills..... none.


My hive guards take out the dreadnoughts assault cannon. And my Swarmlord kills the last tac marine.


Turn 3(sm)
His Terminators come in next to my Swarmlord and he makes the worst mistake of the game. He moves his devastator squad. I had left my Trygon Prime wide open to fire from them now he can't take a shot. My Trygon takes 2 wounds from the Scouts and his force commander in shooting, and his terminators do some wounds to my warriors. He assaults my Swarmlord with Lysander. I kill Lysander and he kills one of my tyrant guard. Leaving me in combat again with one Marine.


Turn 4(me)
I move my bonesword warriors in a position assault the devastators to be able to by turn 5 . I shoot again with my Trygon and do nothing. I assault the scouts with my Trygon. I kill all the scouts and the last Marine from the command squad.


Turn 4(sm)
He turns all his guns on my warriors since they are the only remaining scoring unit in the game. He only manages to kill one. He does one wound to my Trygon with his force commander than assaults with his dreadnought.
I manage to destroy his close combat weapon and he does no wounds.

Turn 5(me)
I assaulted the devastator squad with my warriors, and the Terminators with my Swarmlord. We decided the only thing that mattered was the Warrior fight so we did that first. My warriors wiped out his devastator taking no wounds, and at the point my opponent conceded.


Wednesday, May 19, 2010

The Assault on Black Reach- First Battle

After many weeks of longing to play this game I was finally able to partially achieve just that. It was originally going to be me versus my buddy who is also my wife’s cousin. He called me yesterday afternoon and asked if I cared if he brought my wife’s brother as well. These guys are both looking at getting into 40k so I figured this would kill two birds with one stone.

Once they arrived they were probably a little shocked at the nerd-ness that was taking place on my table.


I went through a simple squad versus squad combat with them to explain the basics of the rules.


After they got the basics down we started out on a full on battle using all of the mini’s from the “Assault on Black Reach” starter set. The wife’s cousin was going to be playing the Orkz with the brother-in-law playing the Space Marines. While I was nose first in the rule book trying to double and triple check how were playing while helping them out with the rules.

We decided to have the Orkz go first.


Once the Orkz moved, the cousin didn’t realize he was in range with his big shooters so he didn’t attempt to shoot with them. The Space Marines saw the whole group of angry Ork warriorz heading his direction and decided to hold ground so he could get the full 24” range on his bolters. The space marine started taking shots with his bolters at the incoming Boyz taking down about 3-4 of the Boyz. He gets a little proud of himself for thinning the ranks of the Ork Army


With the space marine turn over, the orks take to the offensive on trying to close the combat spacing and get in to the assault mode.


The Orks Nobz pull up on the side. They move with-in 12 inches of the Space Marine Tact squad. The Nobz decided to forgo shooting to take a chance at running to hopefully assault the Space Marines. He rolls the dice and BAM! It comes up a 6 with. They get to move forward 6 inches and get ready to assualt.


The Orks Nobz pull up on the side. They move with-in 12 inches of the Space Marine Tact squad. The Nobz decided to forgo shooting to take a chance at running to hopefully assault the Space Marines. He rolls the dice and BAM! It comes up a 6 with. They get to move forward 6 inches and get ready to assualt.


On the assault the space marines go first and whiff. The Nobz come back with a brutal attack of 5 dice each. I think we missed a turn here but this is that happens after the Nobz come in swinging.


On the other side of the battle field the Terminator squad just got done mopping up a small squad of 'Boyz. The Ork Warboss than steps in to help the Def Kopptas out by assaulting the Terminator squad.


The Terminators make short work of the Warboss. He rolls 5 hits and they all wound. The space marines rolls 5 saves in a row! They take out the last of the Kopptas.


The last of the Space Marines then swarm the last three orkz.


All in all we had fantastic time. We made several mistakes with the rules but after this I am looking forward to playing again.

Thursday, May 6, 2010

A Moral Victory

Battle 02 was played last night vs. Mike’s (aka amrbean) Space Marine chapter.  Points limit for the evening was set at 750; he came in at exactly 750 while I was a mere 749.  We rolled Capture and Control for the mission, Spearhead for the deployment, and I won the roll-off, choosing to deploy first and take the first turn.  Mike set his control point in the far corner of his two legal table edges (using his wedding band), and I offset mine a bit towards center to take advantage of a bit of blocking terrain (using an Ethereal painted by my Scottish friend Tom, who first introduced me to 40k several years ago via the original Dawn of War RTS).  I was slightly preoccupied being Dada, so to get things rolling Mike setup the terrain features for both of us, and he allowed me to move one of the trees down near his table edge to beef up the foliage there (for a plan of mine that didn’t work out).

It was with no small amount of trepidation in my mind (and a hungry 3-month-old in my arms) that we shook hands and had at it.  We were so absorbed in playing the game that we didn’t take pictures at some key moments, but whatever; we’re still new at this.

Pre-Game
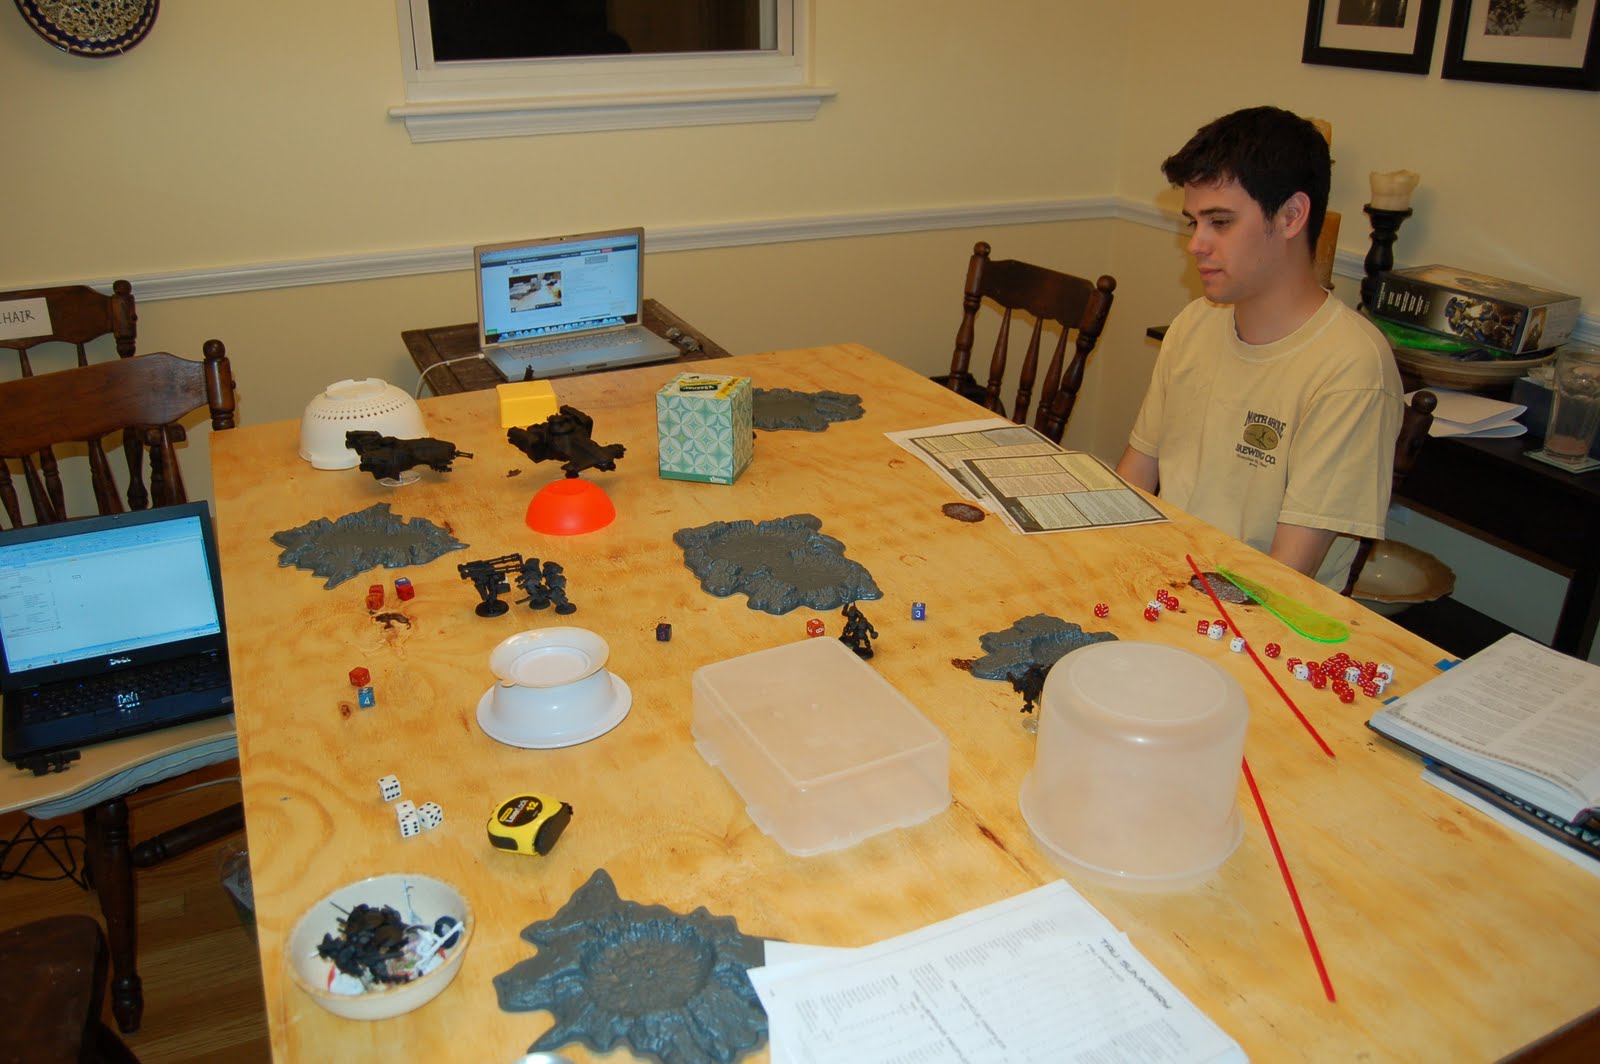
Mike is setting up terrain.  That upside-down-bowl looks vaguely like a Tau building, don’t you think? We’ve already deployed, so this is effectively also a top-of-Turn 1 tableau.  It didn’t matter (as he never fired them), but my Broadside has a Twin-Linked Plasma Rifle rather than the Smart Missile System as modeled.  (I was disappointed with the Hammerhead’s SMS; 24” range was awfully short for my heavy support long-range guy).  We livestreamed the game via justin.tv; that’s what the Macbook is for.  Next time we’ll even try to have the audio working.


Turn 2 (Yes, we forgot to take pics during Turn 1.  Shaz’bot.)
This is the bottom of the turn; I think Mike is looking up some Sniper-related rules at the moment as he gets ready to shoot at my Broadside.  Notice the lack of visible ASMs; Hammerhead submunition rounds took a pretty bad toll already, and the survivors are using the Tau building as cover during their advancement on the Devilfish.   Look closely; see the beautiful patterns all that lovely smoke is making as it billows out of the smashed Predator?  I can’t remember if it was the Hammerhead or the Broadside, but I scored a Crew – Stunned in Turn 1 and a Destroyed – Explodes! in Turn 2.  Now Mike knows how my Devilfish felt in Battle 01.  Somewhere in here I completely forgot about the Kroot for a turn, which let Mike amble on up and chip out a model with his Razorback’s Storm Bolter.


Turn 3
ASMs were unsuccessful in their grenade attack on the Devilfish, who promptly skimmed the hell out of there.  This is where I failed to win the game by not making a beeline for Mike’s objective; I let myself get distracted by the smell of Space Marine blood in the air and worry overmuch about the Land Speeder (in my defense it was armed with a melta weapon).


A few different shots of the end of my Turn 3 player turn.  Scouts dead, but not before Pinning my Broadside.  We didn’t want to stop to look it up, so we agreed that he would’ve been pinned before making the fall-back morale check and then later that at the end of his pinning he was back in play instead of making another morale check for falling back or not; either way it was a moot point, I don’t think he ever managed to get another salvo off.


Turn 4
I moved the Hammerhead in to cockblock the Razorback from having a straight shot at my objective, having remembered that it was crammed to the rim with a full 10-man TSM squad.  That last ASM had managed to shove a grenade up my Devilfish’s tailpipe, which removed any hope of an outright scenario-victory for me.


I managed to wreck the Razorback during my shooting phase, and you can see the TSMs piling out.


Turn 5
I’m sorry, is that a Direct Hit on the scatter dice in the midst of the TSM squad?  Why yes!  Yes it is.  Actually it’s my second direct hit of the night, the first having been earlier vs. the ASMs.


Those Kroot are getting awfully close to the Captain over there on the far side of the table.


Turn 6
Mike rolled us into Turn 6; good for me, not as good for him.  Except that somehow my stupid far-sighted Hammerhead managed to miss the Land Speeder while blocking LOS for the Broadside.  Trying to save his Shas’la, my Shas’el assaulted in and took out 2 TSMs.  There are plasma blasts and missiles landing just about everywhere except on that damn Land Speeder!


Somehow that single damn Kroot passed his leadership check vs. morale.  A Shaper in the making?


The surviving TSMs assault and manage to take out one of my Shas’el’s drones while the Land Speeder scores a second Immobilized hit on the Devilfish (I think Mike was trying to blow it up in order to inflict casualties on the Fire Warriors), taking out the burst cannon.  And the Captain didn’t have any trouble repelling the Kroot’s assault and taking his head off.  Ah well, I guess he wasn’t shaping up after all.  Ha ha.


End of Game
I roll for Turn 7 and come up short; the game ends immediately in a tactical draw, with no one controlling any Control Points.  It’s only just now occurring to me, 2.5 hours after we finished playing, that neither of us technically controlled our own control points.  Oops?  There’s so much to remember.


Post-game analysis, bragging, and commiserating.


Conclusion
This is a damn fun game.

I was convinced going into it that Mike was going to mop the floor with me, but most of my units made good turns of the bad tactical situations I put them in.  I'm laughing (through my yawning) at the fact that neither of us was controlling our own point, but live and learn.  There was plenty of fumbling for the rulebooks, but our fundamental grasp was orders of magnitude better than it was just 10 or so days ago when we played our "prologue" introductory 550 point game.  Tau army lists seem to work a lot of the edge cases (complex units with multiple-wound and single-wound components: can I put a wound on a Shas'el two turns in a row, then put a third wound on a drone during a subsequent turn in order to save the Shas'el?) which it falls on me to be clear about.  I also lost sight of the actual victory conditions early in the game, which led to enough blunders that it snowballed into me needing a complete kill in order to win.

We need more terrain.  I won't be buying any, but even though I consciously tried to bring out lots of stuff to use as terrain features the table was sparse compared to what I see in other battle reports.  That's something else we'll get to over time, I'm sure.

Mike purchased Planetary Empires last week and brought the rulebook for me to skim.  The elegantly simple campaign rules it has look pretty damn fun.  We're going to try and get a campaign going, but it might be difficult to drum up another player who's willing to approach it as, "Let's play a game together!" rather than, "Let's see who I can crush beneath my armored boot."

All in all I feel as though I won a moral victory; I didn't lose the match outright, and I could've easily come closer to victory, if not actually achieving it, if I'd not been so caught up in bloodlust.