Tuesday, September 28, 2010

The Campaigning Season is Open

We've started up a 2-man/4-army Planetary Empires campaign. It's ruleset is an interesting way to shake up the "same old, same old" of the standard 40k missions and, on paper at least, seems like a relatively balanced way of making sure that players who lose a territory or three don't wind up steamrolled and snowballed right out of the game. In brief, someone with fewer territories gets to field a somewhat larger army, while someone with more territories gets a variety of bonuses conferred to their army.

On Planet X, old rivals Tau and Raven Guard square off to maintain their feud.

On Moon Y, the Blood Angels seek to purge the Eldar's witchcraft.

For Round 1 of the we played a single RG vs. BA game, with the Raven Guard boosting to orbit to contest a Blood Angel manufactorum. Deployment was rolled as Dawn of War and mission was rolled as Seize Ground; however, since this was a 750 point game that was starting a bit after 9PM we adjusted to Annihilation for simplicity's sake.

Deployment complete. The RG have a pair of Rhinos on the field with 5 Tactical Space Marines in each. In reserve is a Captain in Terminator armor, a 5-man Terminator squad, a 5-man Devastator-lite squad (a combat squad with a lascannon and a missile launcher), and a Land Speeder. The Blood Angels reserve everything: Librarian with jump pack leading an assault combat squad w/ 2 meltaguns, Sanguinary Priest with jump pack leading an assault combat squad w/ sergeant and guy with powerfist, and a Sanguinary Priest with jump pack leading a full assault squad w/ 2 meltaguns. All of the Blood Angels troops are Tactical Space Marine models standing in for Assault Marines, so keep that in mind.

Middle of Turn 1. Not much do do, really.

Middle of turn 2. The Land Speeder's deep strike scattered into the terrain and passed the difficult terrain test. The Captain suffered a deep strike mishap and I placed him against the far-left table edge on the difficult terrain; the picture is cutoff and doesn't show him. Thanks to Descent of Angels all of the Blood Angels arrive and land pretty much where I want them to. The Librarian used The Blood Lance to wreck the right-hand Rhino while the 10-man squad and the other combat squad were ineffective upon arrival. The Blood Angels also fired off a melta shot, immobilizing the Land Speeder.

The Captain huffed and puffed and came running out of the fog of war, but still has a long way to go. The Devastator squad, which had been conferred the Relentless Universal Special Rule thanks to a RG-held Command Bastion on the metamap, arrived from reserve but missed a krak missile shot. The Terminators also deep-strike in and scatter only marginally, landing safely. The combat squad from the right-hand Rhino assaults into my Librarian-led combat squad and breaks them, and the stupid idiots flee off the table in one jump. The other combat squad disembarks and moves around the building, but takes a couple casualties from my meltaguns (I think, though why I would've shot meltas at TSMs instead of Terminators escapes me). The Land Speeder gets off its only shot of the game, I believe, but doesn't get a kill.

The bottom of turn 3 sees everybody piles onto the Terminators and chops and hack and swing with chainswords and a couple power swords.

By the bottom of Turn 4 the last Terminator is dragged down, joined by the right-hand combat squad, but the left-hand one wanted in on the action, too. The Rhino kind of looks around with a pained expression, since he can't shoot into the scrum, and the Captain shouts, "Hey guys! *pant*pant* Wait *pant* for me!" The Devastators don't roll well on their run and traipse along, enjoying the shell-blasted scenery.

Turn 5 and the game ends. The melee is still going on, but the writing was certainly on the wall. Raven Guard won 4 KPs to 2, I believe, and managed to wrest control of the manufactorum away from the Blood Angels.

Sunday, August 29, 2010

Kill It With (Weight of) Fire

1,000 point game on Thurs, 2010/08/26, SM vs. Tau.  Mission was rolled as Annihilation/Dawn of War.  I won the roll-off and made amrbean deploy first and get first turn, but failed to seize the initiative.  For any who don't know, Dawn of War deployment is up to 1 HQ and 2 Troops on the table at deployment, with nightfighting rules for turn 1 and anything not in reserve entering from your edge of the table at the beginning of the turn.

SM:
  • Chapter Master
  • Drop Pod w/ embarked 10-man TSM squad
  • Land Raider w/ embarked 10-man TSM squad
  • Predator
  • Land Speeder

Tau:
  • Shas'el w/ Shield Drone
  • Shas'el w/ Shield Drone & Gun Drone
  • 2 XV8 attached to Shas'el #2
  • 6 FW
  • 6 FW
  • 5 Pathfinders w/ Devilfish (not embarked)
  • 3 XV88
  • Hammerhead

Turn 1 was fairly ineffective for both of us; amrbean failed to see a unit he was shooting at but his drop-pod landed exactly where he placed it and disgorged an entire 10-man TSM squad.  His HQ is skulking around in the building on the mid-right and scatttered an orbital bombardment completely off my deployed FW squad on the right.  The Land Speeder also scattered on deep strike, but not terribly far.

My deployment was the XV8 Shas'el and a FW squad behind the the hillside on the left and another FW squad on the right in a bombed-out corner of a building.  The only units I placed in reserve were the combined shas'el + XV8 team.  Everything else was set to float/run on at the start of my turn.

This must be from either the end of Turn 1 or the beginning of Turn 2.  The Land Raider and Predator have both rolled up and gotten a few shots off to little effect.  My Pathfinders are running for the hill so they can start dropping markerlights on high-priority targets, and their Devilfish (who's drones I apparently forgot) skimmed up to take on the FWs.  The Hammherhead is hiding behind a low wall and taking submunition + burst cannon shots at the TSMs that spilled from the drop pod, while the Speeder had no luck with its shooting.

Middle of Turn 2.  The right FW squad has been annihilated (first kill point goes to the SMs), but in return my shas'el took out the Land Speeder, my Broadsides blew up the Predator, and my Hammerhead is whittling away the TSMs.  The Chapter Master has come around the corner and has a long way to go to get to anywhere useful.  My shas'el + XV8 kill team has made an on-target deep strike, but I misjudged the ranges by a smidgen and only 1 of them is within half-range of its fusion blaster (which is a Melta weapon).  I fail to get a useful result and jump backwards...

...but not far enough.  The TSMs get out, fire their few pistols + flamer, and then assault in and start chewing me up.  My Hammerhead loses its railgun to a twin-linked lascannon shot and continues plinking at the drop-pod squad with is burst cannons.  Railgun after railgun fires at the Land Raider, but AV14 is a bitch to penetrate, even with S10.  The Devilfish doesn't really know what to do, so it just sorta hovers around in the background.  My lone shas'el bounces back and forth, trying to help take out the drop-pod TSMs.

Shas'el moves up and pew-pews, Hammerhead moves away, Broadsides rip a twin-linked lascannon off the Land Raider, shas'el + XV8s swing about wildly and actually knock a few SM heads off.  Devilfish takes a chance and moves onto the hill without getting immobilized while trying not to block the PFs' markerlights.

The melee ended when I took some wounds, failed a morale test, and failed the initiative test, getting quite a few points' worth of units chopped to bits in the TSM's sweeping advance.

Not that much movement; Land Raider is immobilized and Tau are most comfortable standing around and sniping.  The Devilfish is getting setup for some fun times, though.

SMs are stepping forward, right into my waiting trap.  Pathfinders have taken casualties, but they weren't disappointing underachievers the whole game so I'm not too torn up over it.

Trap springs!  The FWs disembark and the Devilfish surges forward for a tank shock.  Surprisingly enough it works, with the TSMs failing a morale test and falling back.  The Hammerhead and shas'el trim down the drop-pod squad, finally breaking them and causing the sole survivor to also fall back.  Land Raider takes a glancing blow and I roll a 5; that rounds down to a 3 (due to the glance) but is bumped up to a 4 because railguns are AP1. When an immobilized target takes another immobilized result that in turn bumps up to a Destroyed - Wrecked, and it goes down.  Or up; belly-up, that is.

My FWs scootch forward a little bit and it takes the combined firepower of them, my shas'el, and my Hammerhead to wipe the Chapter Master and the lone TSM over there off the board.  The drop-pod finally goes down to my Broadsides.  The Devilfish shoots at the TSM squad but, more importantly, stays within 6" of them so they cannot regroup even with the benefit of And They Shall Know No Fear.

End of Turn 7.  That solitary sergeant is the sole surviving SM model, but even he counts as destroyed when the end of the game comes up and he's still falling back.  Result: Tau victory, Space Marines tabled by rules.

Lessons learned:

  • Land Raiders don't fit 1k point games
  • Don't forget drones on Devilfish (duh?!)
  • BS3, even (especially?) on twin-linked railguns sucks
  • If you bring a Pathfinder Devilfish so you can reroll your deep strike scatter dice, make sure it has LOS when your reserves roll on

Friday, June 18, 2010

For the Greater Good

  • Thursday, June 17th, 2010
  • 750 points
  • Tau (Wadmaasi) vs. Space Marines (amrbean)
  • Mission: Seize Ground
  • We rolled for maximum objectives (7), but due to the lower-than-standard points limit we decide to just go with 5.  amrbean wins the objective placement roll-off and when they're all on the table I've done the one on the hill in the center and in the crater in the bottom-right and he has done the cluster of three that are generally in the top-left quadrant.
  • Deployment: Spearhead
  • I take the bottom-left quadrant and amrbean claims the top-right.  I win the roll-off and elect to have amrbean go first (and thus deploy first)
Deployment complete.  amrbean has a Drop Pod ready for a Drop Pod Assault with 10 Tactical Space Marines embarked, but Combat Squadded into two 5-man units and a Land Speeder in reserve.  The Rhino is also carrying a 2x5 arrangement.  I have a Devilfish with 6 Fire Warriors embarked in reserve.

End of Turn 1.  The Drop Pod crashed to the earth wreathed in a haze of ionization* scattering almost directly on top of an objective and blocking LOS from one of the XV88 Broadside Battlesuits to the Predator, while the Rhino moved up with an eye on the objective in the crater and popped a very effective cloud of smoke.  The Predator took some shots at my shas'el, causing 1 wound.  I poured torrents of fire into the Rhino from almost every type of weapon I fielded, but the God-Emperor was with its Machine Spirit that day and it passed a ridiculous amount of cover saves losing only the Storm Bolter.  Since the Drop Pod was blocking the Predator from view, the Broadside with no line of sight to the Rhino punched a railgun slug straight through the SM Captain in a glorious, gory spray as his Iron Halo failed to protect him.  Three wounds, you say?  Meet the Instant Death rule!

*Drop Pod Assault rules specify that it must open and all embarked units must deploy immediately, but neither of us were aware of that.

End of amrbean's Turn 2.  The crew of the Land Speeder were still getting into their power armored skivvies and didn't show up.  The Drop Pod opened one of its deadly petals (for our purposes thus becoming Open-Topped) and disgorged a 5-man TSM Combat Squad.  Promethium is some seriously nasty shit when your troops are only T3 and 4+ save; the 7-man FW squad was reduced to just the shas'ui in a single, searing blast of roiling flame.  He was merely enraged at the slaughter of his bonded brothers-in-arms, though, passing his Morale test and standing firm.  Another 5-man TSM Combat Squad disembarked from the Rhino, but in such a position that they weren't quite in rapid fire range of the Sniper Drone Team and XV8 Crisis Battlesuit team on the plateau.

End of my Turn 2.  The Devilfish arrives and, in a fit of panic at seeing all the smoking Fire Warrior corpses, the pilot doesn't move far enough forward and ejects his passengers out of rapid fire range of the disembarked TSMs.  To help cover for this gaffe, both the shas'els unleash plasma and missile fury at them, killing 3 of 5 (I think)*.  One of my Broadsides earns his points by smashing a railgun slug deep into the Predator, reducing it to wreckage, while the other fails to hit the broad side of the Rhino, which the Sniper Drones also plink ineffectually at it with no help from the team leader's markerlight.  The Deathrain XV8 team has good shooting luck, decent wounding luck, and horrible saving luck, not harming the lascannon-including Combat Squad near the crater objective.

*We were also playing And They Shall Know No Fear incorrectly, so they didn't take a Morale test.

End of Turn 3.  We started getting sloppy with the picture-taking, so a lot is missing.  The Land Speeder arrived by Deep Strike, coming down almost where the Devilfish is in the picture, but the crew were so happy to've gotten dressed without the God-Emperor's help that they flubbed their multimelta shot at the Devilfish, which was just inside half-range of the Multimelta and thus also too close for its disruption pod to've had any effect.  The Rhino turned and moved toward the Tau position, but twin-linked S10 AP1 shots are not to be trifled with and it detonated in spectacular fashion, though all of its troops were unscathed.  The Land Speeder met an identical fate.  With their path forward clear, the Fire Warriors embarked into their Devilfish which zoomed off toward a far objective.

I think we didn't take a pic at the end of Turn 4, so I'm hazy on the details.  The TSMs move + assault out of the crater, making sufficient difficult terrain tests to easily cover the distance, tying up a Broadside in melee but causing no wounds.  The lascannon-wielding TSM takes the last wound from the shas'el that was on the central plateau, inflicting a "wasted" Instant Death shot.  The Drop Pod also erupted in a shower of shrapnel; I think one of the TSMs was lost in the metalstorm, but they were not pinned.  The Devilfish swims a bit more towards the top-most objective, disembarking its drones first so they can attempt to contest the objective.  Lots of consolidation toward the control points that are in play.

End of Turn 5.  The Sniper Drone Team gets so electronically excited at just 1 SM remaining on the right that they whiff every single shot.  The Deathrains have no luck punching through power armor and sidle forward for a possible assault + contest, while the remaining shas'el bears down on the same target behind an ineffective fusillade.  We roll to continue or end the mission...

..and we continue into the middle of Turn 6, after amrbean's player turn.  The TSMs continue their desperate struggle against the Broadside, but 2+ is a tough armor save to crack; the Broadside endures it all and actually connects with a few wild swings to bash some SM heads in.  In exchange, though, the lascannon melts the shas'el limb-from-limb, marking the first time amrbean has killed both HQ choices.  I don't recall what the TSM squad in the drop pod crater did; looking at the picture they must've finally put an end to the Fire Warrior shas'ui.

End of game.  The Devilfish moved up to claim an objective, disembarking the FWs within control-distance but out of rapid fire range. I'm no good at judging distances.  The Sniper Drone Team leader finally finds his range with the markerlight again, allowing his drones to riddle the lascannon-wielder with holes and sending him to meet his God-Emperor face to face.  A similar fate befalls the remaining few TSMs as the Devilfish, Broadside, and Deathrains fire, fire, and fire again, whithering them away to nothing.  To add insult to injury, the XV88 Broadside seems to get the hang of this clumsy hand-to-hand stuff and puts down the remaining TSMs who had engaged him.  The mission ends in tabling that did not come easily.

Wednesday, June 2, 2010

Victory is Mine

amrbean and I played our fourth match Monday, 2010/05/31, and the luck of the die (and a bit of tactical fumbling on both our parts) brought me an incontrovertible, but hard-fought, victory.  We rolled Capture and Control for the mission and Spearhead for the deployment, with 750 point armies (my cadre list is in the sidebar).  amrbean won initiative, choosing to go first (and thus deploying first).  We deployed, with amrbean  putting it all on the line while I reserved my Devilfish with embarked 6-man FW squad.  I failed to seize the initiative, and the game was afoot!

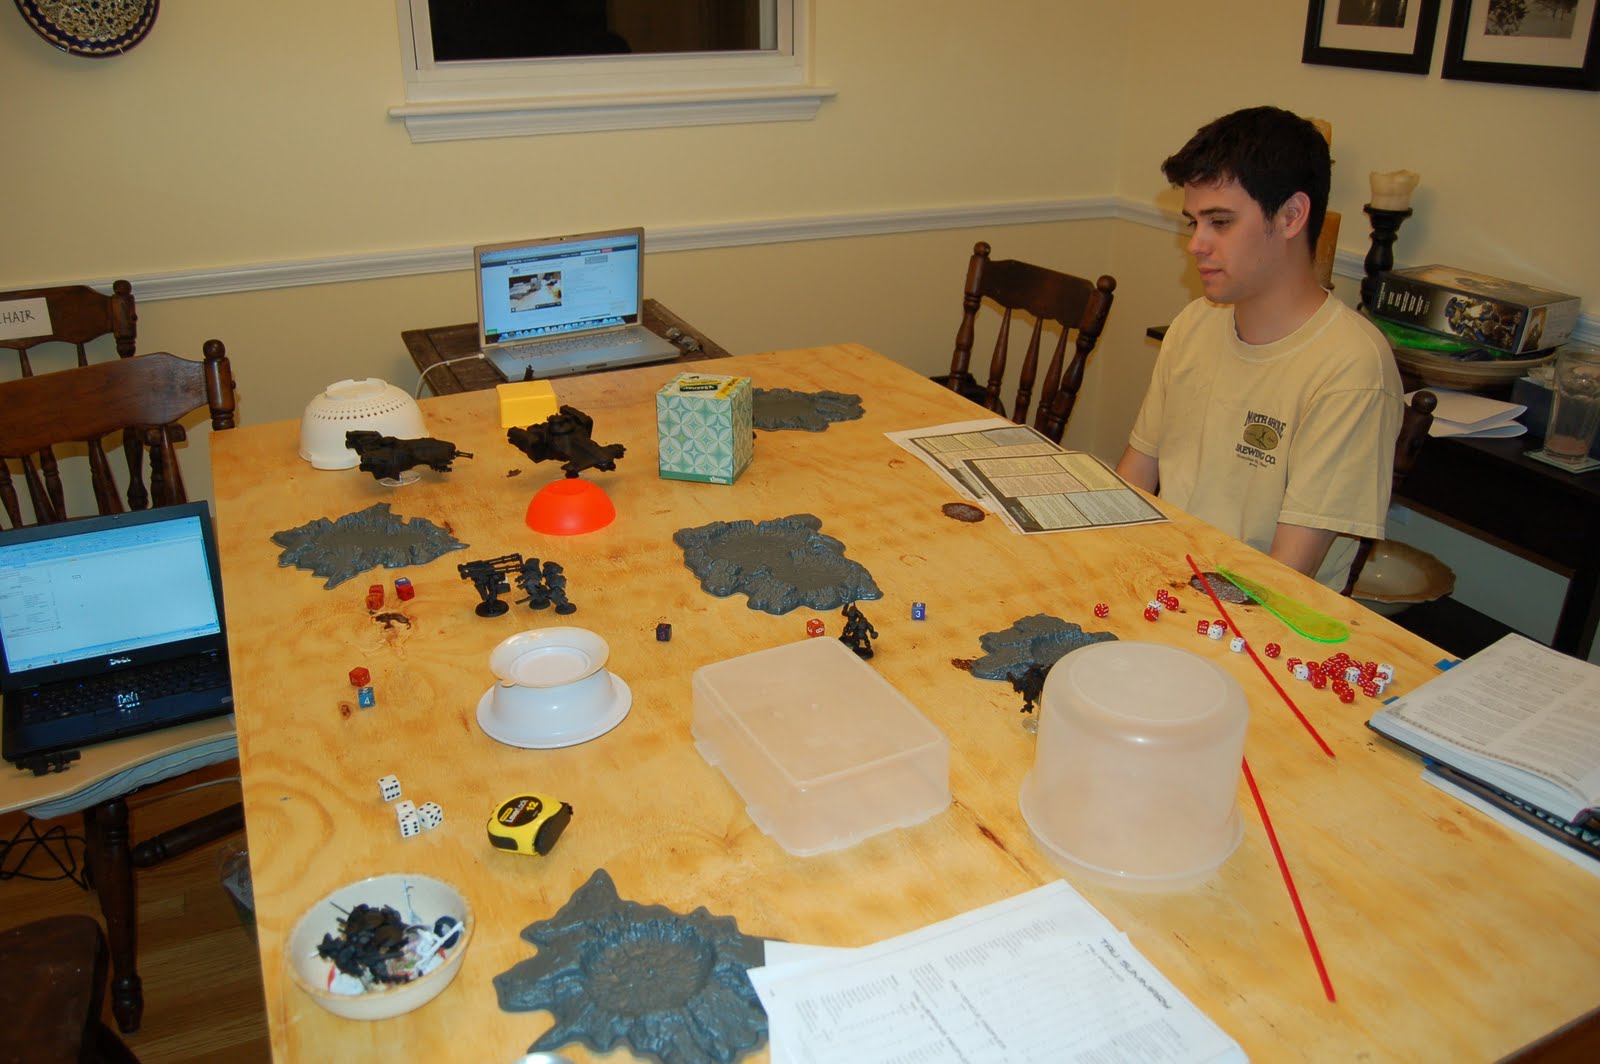
We tried to livestream the game over justin.tv, but the broadcast quit after 20 minutes or so and I have no idea why.  We didn't bother with trying to get it working again.

Turn 1: I believe this is in the midst of my movement phase at the bottom of Turn 1; I forgot to take a pre-game/post-deployment picture.  The first turn was a bit of shuffling around and some ineffectual shooting on both our parts.  In subconscious penance for being at 759 points during our last game (SMS instead of burst cannons on my Hammerhead), I forgot that my XV88 had a targeting array and thus played with BS3 and 739 points.  And I know for a fact that I rolled a few 3s during the game that would have been hits if I'd remembered that TA.  *sigh*  I don't think his (twin-linked!) railguns managed more than a weapon destroyed and an immobilized all game.

Turn 2:  My reserves failed to arrive.  Volleys of fire splattered 2 Kroot Carnivores and nicked the armor on my forward-most shas'el.  From off-screen, the Predator manages some nice long-range shooting and immobilized my Hammerhead almost right on top of my objective.  Lots of wild return-fire from my units in the thick of the scrum had no effect beyond destroying the Rhino's storm bolter.

Turn 2: Up at the top of the battlefield, though, amrbean 's Predator swung wide and is ready to come charging down the edge; its placement will cause me some panicked indecision later on.  My Stealthsuits with their combined total of 18 shots per turn have managed to gun down the foolishly heroic Captain.  I mean, really, what was he going to do, play ring-around-the-rosie with them?  They were hopping up and down the piece of tupper-terrain, there, staying out of line of sight of the scouts and out of melee range of the Captain.

Turn 3: I'm not sure exactly when this picture was taken; itmust be in-between player-turns in turn 3.  From the time-stamp it's several minutes later, but look how far forward my Stealthsuits are from the last pic.  It's before my player turn 3, though, as my Devilfish has not yet arrived from reserves.  So I'm not really sure WTF is going on here.  The Dreadnought smells blue blood and is bearing down on the wounded shas'el and the Rhino is trying to get its embarked 10-man SM squad as close to my objective as possible, but other than that I have no recollection.  Looking at the next pic in line amrbean is still moving his units, as the Dreadnought winds up in a different place.

Turn 3: This is the end of the turn.  My Devilfish+FWs have arrived and made a cruising-speed move directly toward amrbean 's objective.  They've tantalizingly stopped in front of the Predator, blocking one of its lascannons and tempting it mightily with a side-armor shot.  I believe I scored another weapon destroyed on the Rhino, which upgrades to an immobilized in the absence of more than 1 weapon.  The Kroot are guarding the objective, the Stealthsuits are looking to mow down some scouts (having taken a casualty but holding firm), I don't recall what I did with the Hammerhead, and the Broadside keeps not blowing up the Rhino.  Also, amrbean is playing host to a chest-burster, apparently.

Turn 3: Effectively the same picture?  Timestamps bear that out.  Maybe I was trying to get the flash to work, I dunno.  I'll leave it here for posterity!

Turn 4: End of amrbean's player turn.  ASMs have been in hiding most of the game, locked in combat with my shas'el.  They've managed to take him down and the survivors are looking to do the same to my 2nd one. Look how dejected amrbean is that his Rhino has failed to repair, and his TSM squad has disembarked + run at my Kroot.  I'm pretty sure the Predator took a snapshot at my Devilfish as it swam past and blew off its  nose-mounted burst cannon.

Turn 4: I dispensed a lot of death on this turn.  The TSM squad was on the receiving end of the brunt of it: the Kroot rapid-fired their rifles, the Hammerhead blasted away with both burst cannons and the ion cannon, the Broadside put a railgun slug straight through someone, and the Devilfish squirted forward only to belch 6 Firewariors who took aim with their pulse rifles. Results: even with a 3+ armor save, that's a lot of weight of fire to try and survive, and only 3 did.  One guy with a lascannon, one guy with a flamer, and one guy with a bolter.  My surviving shas'el gunned down the ASMs while the Stealthsuits riddled 3 scouts full of holes and continued forward to try and contest the objective.

Turn 5: We got so wrapped up in it that I didn't take any mid-turn pics.  amrbean's flamer-armed TSM took out all but 3 of my Kroot with a single shot (no armor saves, damn useless Kroot!) but somehow they held the line and the objective.  He gambled on a turn 6, assaulting his scouts off the objective and into my Stealthsuits, managing to bring them both down but leaving the objective uncontrolled.  The centrally-placed Fire Warriors turned their iron sights on the no-longer-in-melee scouts and managed to put one of them down.  My Devilfish rammed the throttles to the stops, ejected the drones, and sent them forward to contest the objective come turn 6.  Between the Kroot, Hammerhead, and shas'el (who'd played a near-thing game of chicken with the Dreadnought) the remaining TSMs were buried 6 feet under.  Mike rolled for continuation-of-mission and...

It's game over, man, game over!  Look at that thousand-yard stare.  With my Kroot on my objective and amrbean's lone surviving scout about 3.5" away from his objective, victory is mine.  It was an intense game that could've gone either way; amrbean's dice went completely cold for his Turn 2 or 3 shooting phase, and my mine were almost on fire for my corresponding shooting phase.  Rules-wise we did very well, I think, the biggest blunder being some incorrect shooting-then-running and moving + firing heavy weapons, which we were able to immediately redact so they didn't affect the final outcome.  I got REAL lucky with the flamer template needing to be placed at the shooter's base, not the barrel of his weapon, or all of those Kroot would've been dead.

Just another end-of-game angle.

Just another end-of-game angle.

It was a gg all around and left us feeling comfortable enough with our grasp of the rules that we'll be playing a full 1,000 point game next, whenever that may happen to be.

Tuesday, June 1, 2010

Victorus aut Mortis!

Chapter Master,

With heavy heart I must report I have failed the Emperor and disgraced the Raven Guard chapter. My unit made contact with a Tau force in a Spearhead deployment. It was clear from the get go they were after our Comms relay and we were after there objective. I had the Rhino with 10 tactical troops inside up front, along with a predator and dreadnaught. I kept the sniper scouts back near the Comm relay and the Captain stood near the side waiting for a flank. Luckily, we had the drop on them and moved into position first.

Since the Rhino and 'naught were out in the open, I ordered both to pop smoke right away. The dreadnaught fired at one of their damn mechs causing a decent amount of damage. What may be our failing was that the predator, equipped with an autocannon and two lascannons, fell just short of its target.

The Rhino continued to move forward; B-lining for their objective. A lascannon on the hammerhead knocked out an engine on the enemies hammerhead, causing the vessel to become immobilized. The assault marines continued to do what they do best, assault causing a wound to another mech.

Sadly, this is where things begin to turn around for us. Since the Rhino became immobilized, the marines shuffled out and ran for the objective taking heavy losses. The snipers again couldn't see any targets, but the predator destroyed the weapon systems on the enemies devilfish.

Hoping that the combat would continue, I ordered the snipers to move off the objective and engage our attackers. They succeeded in their attack, but were unable to reclaim our objective in time. This was our failing. Our final few tactical marines worked on clearing out the enemy objective which was surrounded by disgusting Kroots. Our flamer laughed as he took out 7 of the 10 units. But in the end it was too late. We failed to even contest their objective. And while they failed to get close enough to ours, I had ordered the snipers to move away; which lead to our defeat.

One thing I need to work on Chapter Master: Paying closer attention weapon types.

I hope my next engagement with the Tau will be a larger one and I will not fail the Emperor.

Friday, May 28, 2010

Round Three....FIGHT!

We had our third battle Thursday, 2010/05/27.  Because it was a weekday, Mike has night classes three times a week, and I've got a three year old and a four month old, we set a hard limit of 2230 being the cutoff time.  We started pretty close to 2030 and were making decent time until aforementioned infant spewed about four ounces of formula all over my wife.  So the game ended at about 2215 right in the middle of my shooting phase at the bottom of turn 5, with no clear victor apparent.  I don't know how in the hell the rulebook can be so blasé about 1000 point games taking "about an hour."

We rolled for Seize Ground and Pitched Battle, but went with Annihilation for simplicity since time was a factor.  Mike won the who's-on-first roll, and made me deploy first.  I had every intention of seizing the initiative but forgot to.

Deployment and infiltration complete.  Mike's scouts in the crater there did not take a scout move.

End of turn 1.  Mike took out my Broadside's gun drone, caused a wound on the Broadside, and pinned it.  He did pass his leadership test to not break, though.  I did a shitty job deploying my Hammerhead behind cover and the Predator zapped it for a Crew - Shaken result.  I moved my Kroot around to start moseying in the direction of the Captain; I keep forgetting that they have rapid fire weapons (I only think of them as melee and bubble wrap) so they didn't shoot at him.  It's hard to tell, but my Stealthsuit team and 2 HQ Crisis suits pulled of a kill or two against the scouts.

Another view of the end of turn 1.

I think this was the end of Mike's player turn 2.  ASMs are in melee with my Broadside and will remain there into turn 5.  The captain assaulted the Kroot and started whittling them down.  The Predator got another Crew - Shaken hit against my Hammerhead.  The Dreadnought splattered a Stealthsuit with a multimelta shot, but the other 2 passed their leadership test and held.

End of my player turn 2.  I finished off the Scouts with my Stealthsuit and HW teams and retreated them away from the Dread.  The XV88 stood back up and continued whaling away on the ASMs, with everybody passing their armor saves (get used to reading that).  The Koot and the Captain traded blows, with the Captain knocking off a few more Kroot but failing to break their spirits.  I think they put a single wound on him here.  I managed to destroy the storm bolter on the Rhino.

End of Mike's turn 3.  The Pred fried a Stealthsuit here with a lascannon shot.  I think.  It might have been an HQ drone.  Either way we did the Instant Death rule incorrectly; whoever the target was should've gotten a save, which I didn't take.  Just helps to make up for the fact that I was reading the Broadside Shas'vre statblock for several turns instead of the Shas'ui statblock because they're not one after the other on the Tau summary page.  WTF?  All it did was bump his leadership by 1, and I don't think he passed any tests by that slim a margin anyhow. The Dread blasted some shots at my Stealthsuit team (I think?) but failed to kill anyone.

End of my turn 3.  Dread is dead, due to some sharp shooting from my HQ Crisis suits.  The Broadside/ASM scuffle is still stalemated.  My Devilfish with embarked Fire Warriors arrived from reserve and my Hammerhead finally got to come out and play and managed to pop the Rhino but caused no casualties among the 10-man TSM squad (one of whom is wielding a lascannon).  I did a horrible job moving both of my skimmers, though, and they were not positioned well at all.  Mike definitely zapped a drone by now, and one of the HQ suits has a wound or 2 on it.  At this point most of my infantry units have NO CLUE what they should be doing, because you can't shoot into melee and that fucking Broadside would not die.  Kroot take a few casualties, hold, and maybe give the Captain his 2nd wound.

End of Mike's turn 4.  Kroot are all dead (Captain is cowering behind the yellow building there), the wounded HQ XV8 is dead (lascannon shot, took a save and failed), and the Hammerhead's Ion Cannon got blasted off.  ASMs suck miserably and can't kill my Broadside, god damn it all.

End of my turn 4.  My surviving Shas'el showed both his personal superiority and the manifest superiority of the Greater Good by rolling a 6 for penetration vs. the Pred's side-armor and then a 6 for damage-result, taking it down with a missile pod shot through an engine hatch or something.  My Stealthsuits start to move toward the TSM squad, as does the Shas'el with his assault move.  The Devilfish *pew*pew*s with it's burst cannon and drones, but doesn't do much; ditto the Hammerhead's Smart Missile System.

Mike's turn 5 finally saw the death of my XV88, and his lascannon took off the Hammerhead's SMS.  I was barely finishing my moves (Hammerhead decided not to tank shock, Devilfish was moving up to disembark for rapid-fire vs. the SM squad, Shas'el and Stealthsuits were going to pour it on vs. the ASMs) when my youngest puked up most of a bottle.  We tried to work in some shooting while I was helping my wife deal with that, but quickly decided to just call the game as it was almost exactly 2230 anyhow.

Hopefully we're going to play again on Monday, and I want to use the same lists as I've got ideas on how to work my tactics somewhat differently to force a different type of game.

Monday, May 24, 2010

Hatchet's Nid vs SM All Around Defenese

Nids(me) vs SM
1540 pts

My Army
HQ
Swarmlord
2x Tyrant Guard(lashwhips)
Elite
2x Hive Guard
Venomthrope
Troops
4x Tyranid Warriors (boneswords, scything talons)
5x Tyranid Warriors (4x deathspitters, venomcannom, scything talons)
9X Genestealers (toxin sacs, Broodlord)
20x Hormagaunts (toxin sacs)
Fast Attack
10x Gargoyles (toxin sacs)
Heavy
Trygon Prime

SM Army
HQ
Lysander w/ Command Squad
Force Commander
Elite
5x Terminators (power fists, stormbolters, power sword)
Dreadnought (assault cannon, close combat weapon)
Troops
10x Scouts w/Telion (6x Snipers, heavy bolter, bolt guns)
2x Tac Squad (Missile Launcher, flamer)
Heavy
1x Devastator Squad (2x Heavy Bolter, Plasma Cannon, Lascannon)

We decided to use the battle missions book for our game we ended up with the Space Marine special mission All Around Defense. This special mission has one objective point in the middle of the table and who ever controls it at the end of them game wins. We set the terrain up with four building in the center and some others scattered around the outside. The special rules for deployment was to take turns placing a unit, Space Marines could only deploy up to 12 inches away from the center marker and I had to deploy at least 18 inches away from the center marker. Since I was the attacker I also had place my HQ and Heavy in reserves at the start. After deployment it was a roll off to see who went first. The way everything was set up it looked like whoever went first was going to win. Luck was on my side and I got first turn.

Turn 1(me)
I had to keep my Swarmlord w/ guard and Trygon in reserve which worked out pretty good. I also kept my Genestealers in reserve.


I moved everything to be in position to assault. My shooting was lack luster. I killed 3 scouts with my warriors and just stunned the dreadnought with my hive guard. I ran my hormagaunts in a position so I can get his devastators and the tac squad in combat so I wouldn't have to worry about getting shot up from them.


I assaulted and was hoping for some amazing results since I have 60 attacks going towards the marines. I kill five marines and he kills 11 homagaunts after No Retreat! wounds. The gargoyles assaulted the other tac squad and didn't fair to well either, with 7 gargoyles down to his 3 marines. But considering the point cost comparison the gargolyes did great.


Turn 1(sm)
With all his units but Lysander w/ command squad, force commander and snipers in assault and the dreadnought being stunned he didn't have much to do. His snipers were out of coherency and had to move them, so lucky me didn't have to take any shots from them. He moved Lysander and company toward the hormagaunt assault and dropped an orbital bombardment on my warriors. I lucked out and he only hit one killing it out right.
The assault was a massacre he killed the rest of my hormagaunts and only lost one marine from his command squad due to having to take a dangerous terrain test thanks to my venomthrope.


My three gargolyes were amazing! ok well not really 2 of them died leaving me to have to take 2 No Retreat! wounds needing 2 6+ to save HE LIVED! One lone gargoyle holds off 7 Space Marines.

Turn 2(me)
I rolled for reserves and brought in my Swarmlord and Genestealers.
Again my shooting was lack luster with the only thing that happened was stunning the dreadnought. My bonesword warriors made their way to the tac squad that was still tied up the the gargoyle and assaulted. They destroyed the squad leaving a lonely Sargent but I did lose my gargoyle.


On the other side of the table my gun warriors and venomthrope attacked the command squad and tac squad. Things did not go so well for me with me losing everything and him taking no wounds.


Turn 2(sm)
Well now I'm in a bad spot and all his gun are bearing down on me.
His shooting commences and leaves me with a genestealer and a broodlord. He assaults and my genestealers and broodlord roll ok killing 2 of his command squad but he kills them in turn. His tac squad assaults my Swarmlord and guard. They kill all but Marine leaving me stuck in melee which sucks.


Turn 3(me)
My Trygon prime comes in right next to the scouts. Takes his 12, strength 5 shots and kills..... none.


My hive guards take out the dreadnoughts assault cannon. And my Swarmlord kills the last tac marine.


Turn 3(sm)
His Terminators come in next to my Swarmlord and he makes the worst mistake of the game. He moves his devastator squad. I had left my Trygon Prime wide open to fire from them now he can't take a shot. My Trygon takes 2 wounds from the Scouts and his force commander in shooting, and his terminators do some wounds to my warriors. He assaults my Swarmlord with Lysander. I kill Lysander and he kills one of my tyrant guard. Leaving me in combat again with one Marine.


Turn 4(me)
I move my bonesword warriors in a position assault the devastators to be able to by turn 5 . I shoot again with my Trygon and do nothing. I assault the scouts with my Trygon. I kill all the scouts and the last Marine from the command squad.


Turn 4(sm)
He turns all his guns on my warriors since they are the only remaining scoring unit in the game. He only manages to kill one. He does one wound to my Trygon with his force commander than assaults with his dreadnought.
I manage to destroy his close combat weapon and he does no wounds.

Turn 5(me)
I assaulted the devastator squad with my warriors, and the Terminators with my Swarmlord. We decided the only thing that mattered was the Warrior fight so we did that first. My warriors wiped out his devastator taking no wounds, and at the point my opponent conceded.